astro-po-i18n
The alternate way of translating Astro
With this skeleton for astro, you can jumpstart an multilingual site that is translated via standard gettext and .po files.
This approach has many advantages, as well as some disadvantages when compared to astros default approach to i18n:
- 😆 Write your content/astro-files only once instead one per translation
- 😄 Translators can handle the format even without dev knowladge
- 😁 You can use services like crowdin to let users translate
- 😁 Poedit enables you to translate with AI
- 😊 SEO-Safe
- 😊 Warns you about missing translations
- 🙂 Builds all translations at once
- 😐 Previews only one translation at a time
- 😢 no translatable URLs
- 😢 no support for SSR. This is SSG only
1. Install
Just run these two commands, to receive this basic skeleton:
-
git clone git@github.com:Suven/astro-po-i18n.git npm i
2. Adjust your setup
Specify which languages you wish to support and which is your main one, within utils/i18n.js:
const mainLocale = "en";
const locales = ["en", "de", "es"];
For SEO-safety you are also advised to configure your final domain within astro.config.mjs:
site: "https://example.com",You might also want to delete all already shipped translations
rm -rf ./locales/*3. Place your texts
There are two workflow flavours in the gettext-communities. The common way is to just place your texts in your main language (commonly english) directly within your templates. That way you are not using keys and give translators a better context of what you want to be translated. It also makes sure that your main language is always fully translated.
The other approach uses keys, that then first need to be translated into your main language. It leaves your content responsible colleagues more freedom but makes it harder for translators. It also comes with the disadvantage that you might overlook to translate content, when the main translation changed its meaning.
The first approach of using direct translations, is more often advised to be used.
Direct placing Example
---
import gt from "../utils/i18n";
import sprintf from "sprintf-js";
---

<div>{gt.gettext("optionalContext", "Hello World!")}</div>
<div>{gt.gettext("This is the default text")}</div>
<div>{gt.ngettext("I want an apple", "I want apples", numberOfThings)}</div>
<div>{sprintf(gt.gettext('%(username) eats apples everyday!'), { username })}</div>
Keyed placing Example
---
import gt from "../utils/i18n";
---

<div>{gt.gettext("optionalContext", "key")}</div>
<div>{gt.gettext("key")}</div>
<div>{gt.ngettext("key.singular", "key.plural", numberOfThings)}</div>
3b. Placing links
This skeleton also comes with a helper to place localized links within your project.
---
import { url } from "../utils/i18n";
---

<a href={url('/about')}>Link to /about while staying in the current language</a>
<a href={url('/about', 'en')}>Link to the english version of /about</a>
<a href={url('/about', 'en', true)}>Link to the english version of /about including the full domain</a>
4. Start translating
This tutorial continues using Poedit which is a powerful and commonly used tool for handling po-files. You are free to use any of the various alternatives though.
Start by creating a new translation via CMD+N and choosing the target language. Store that with CMD+S in the locales folder like (for example) es.po.
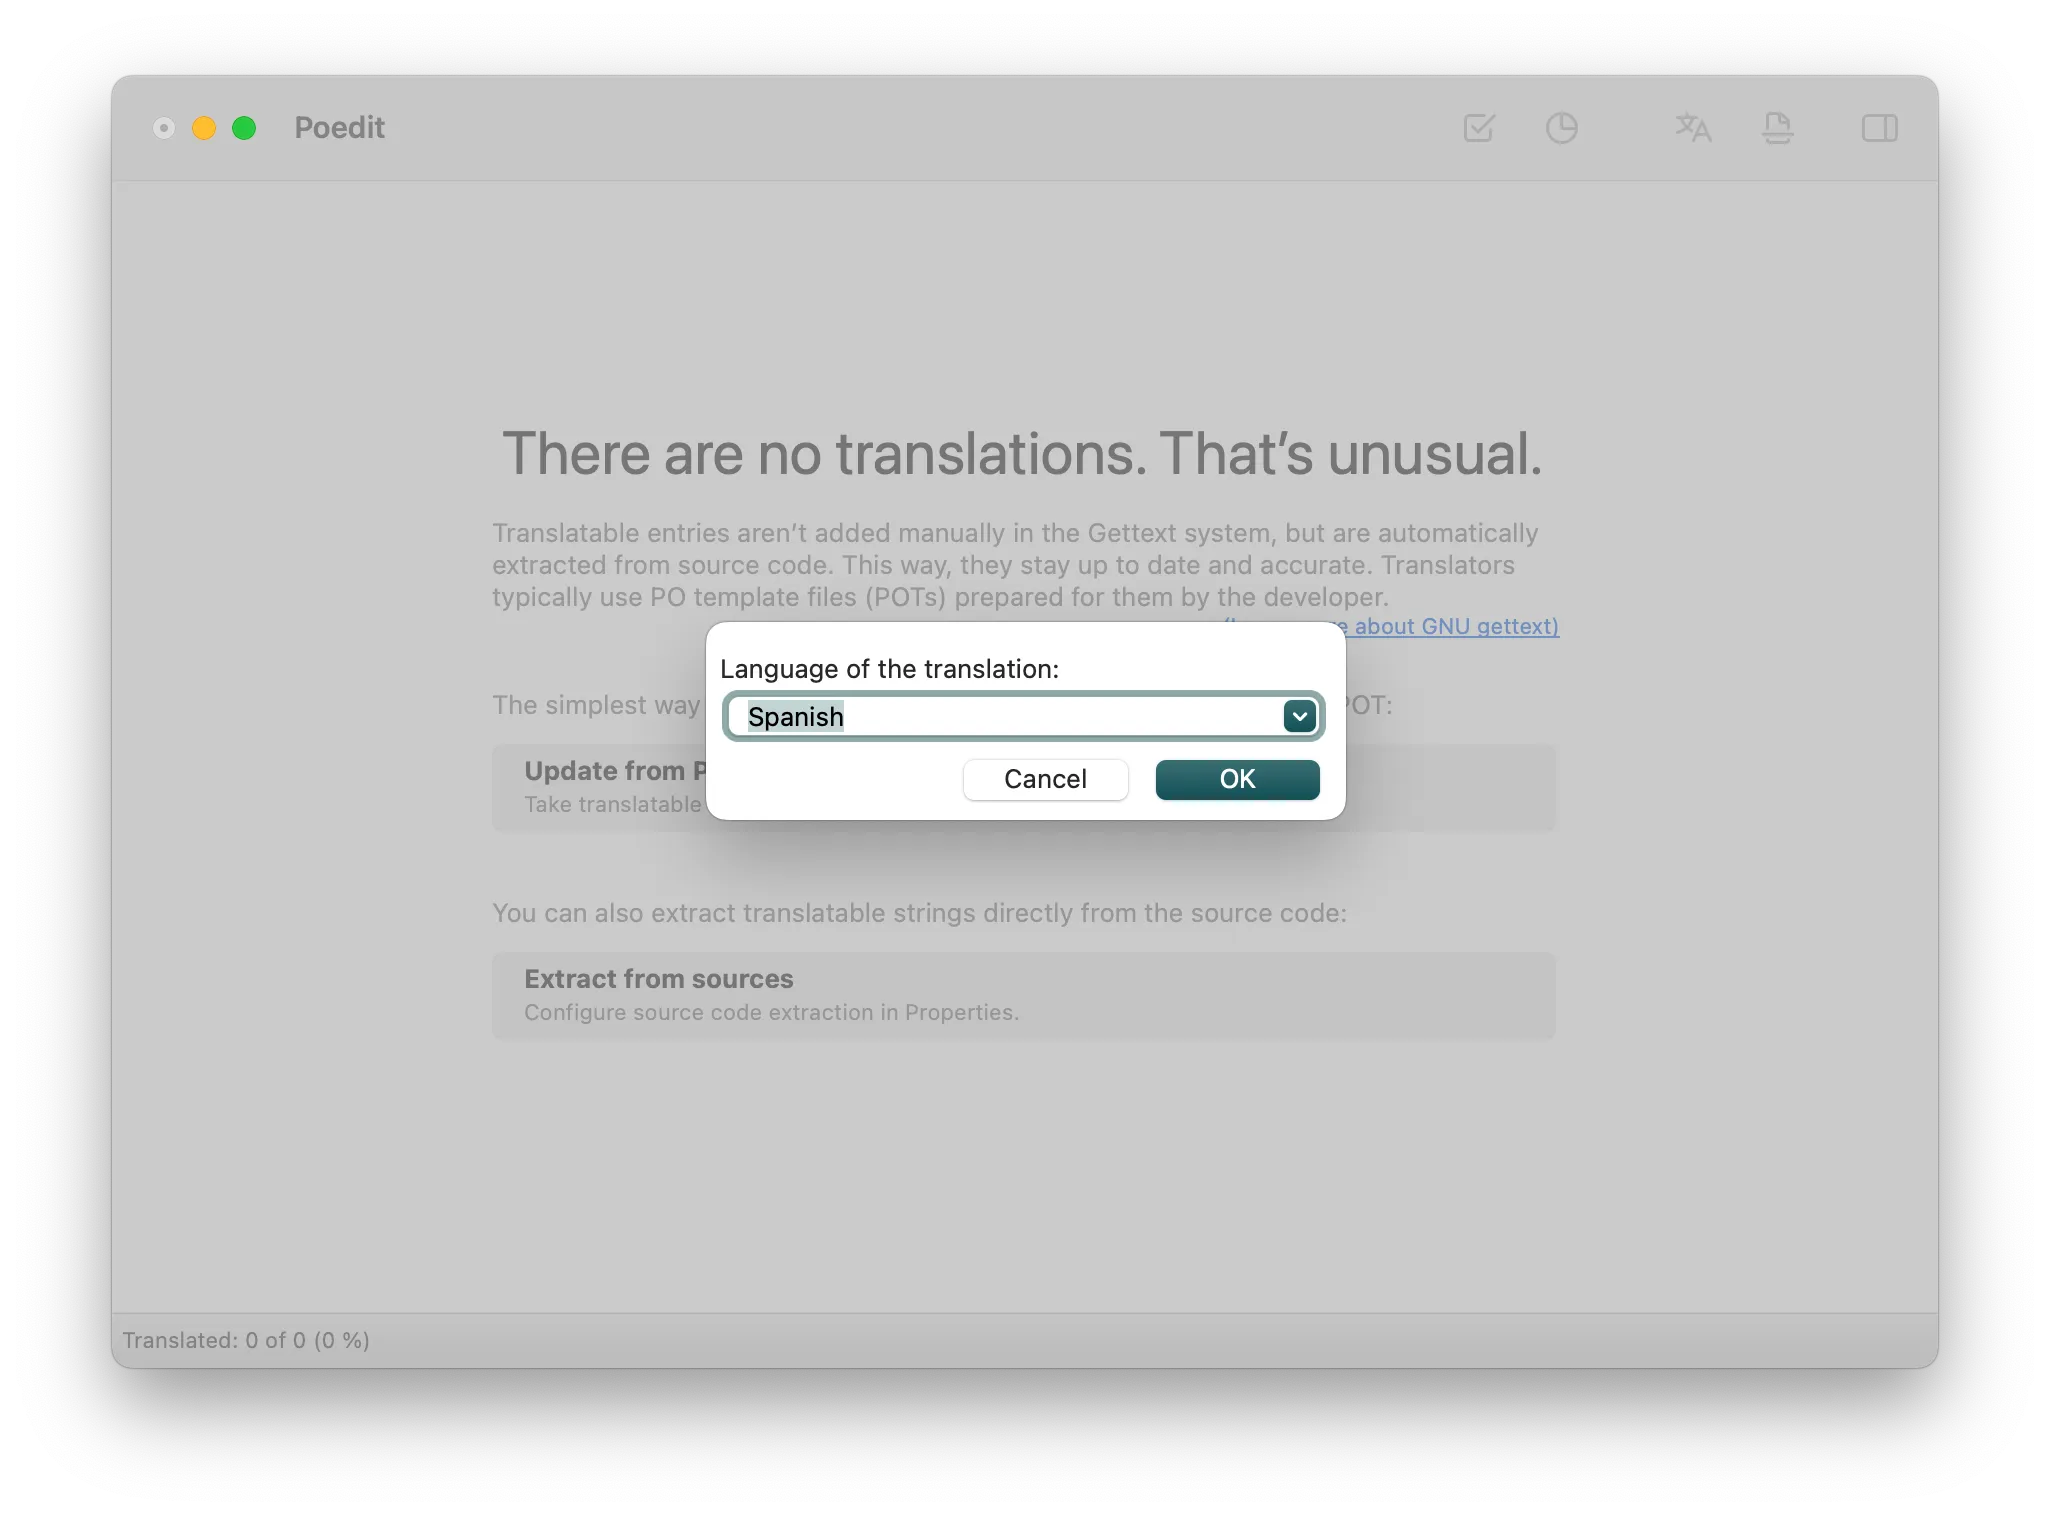
Start by creating a new translation via CMD+N and choosing the target language. Store that with CMD+S in the locales folder like (for example) es.po.
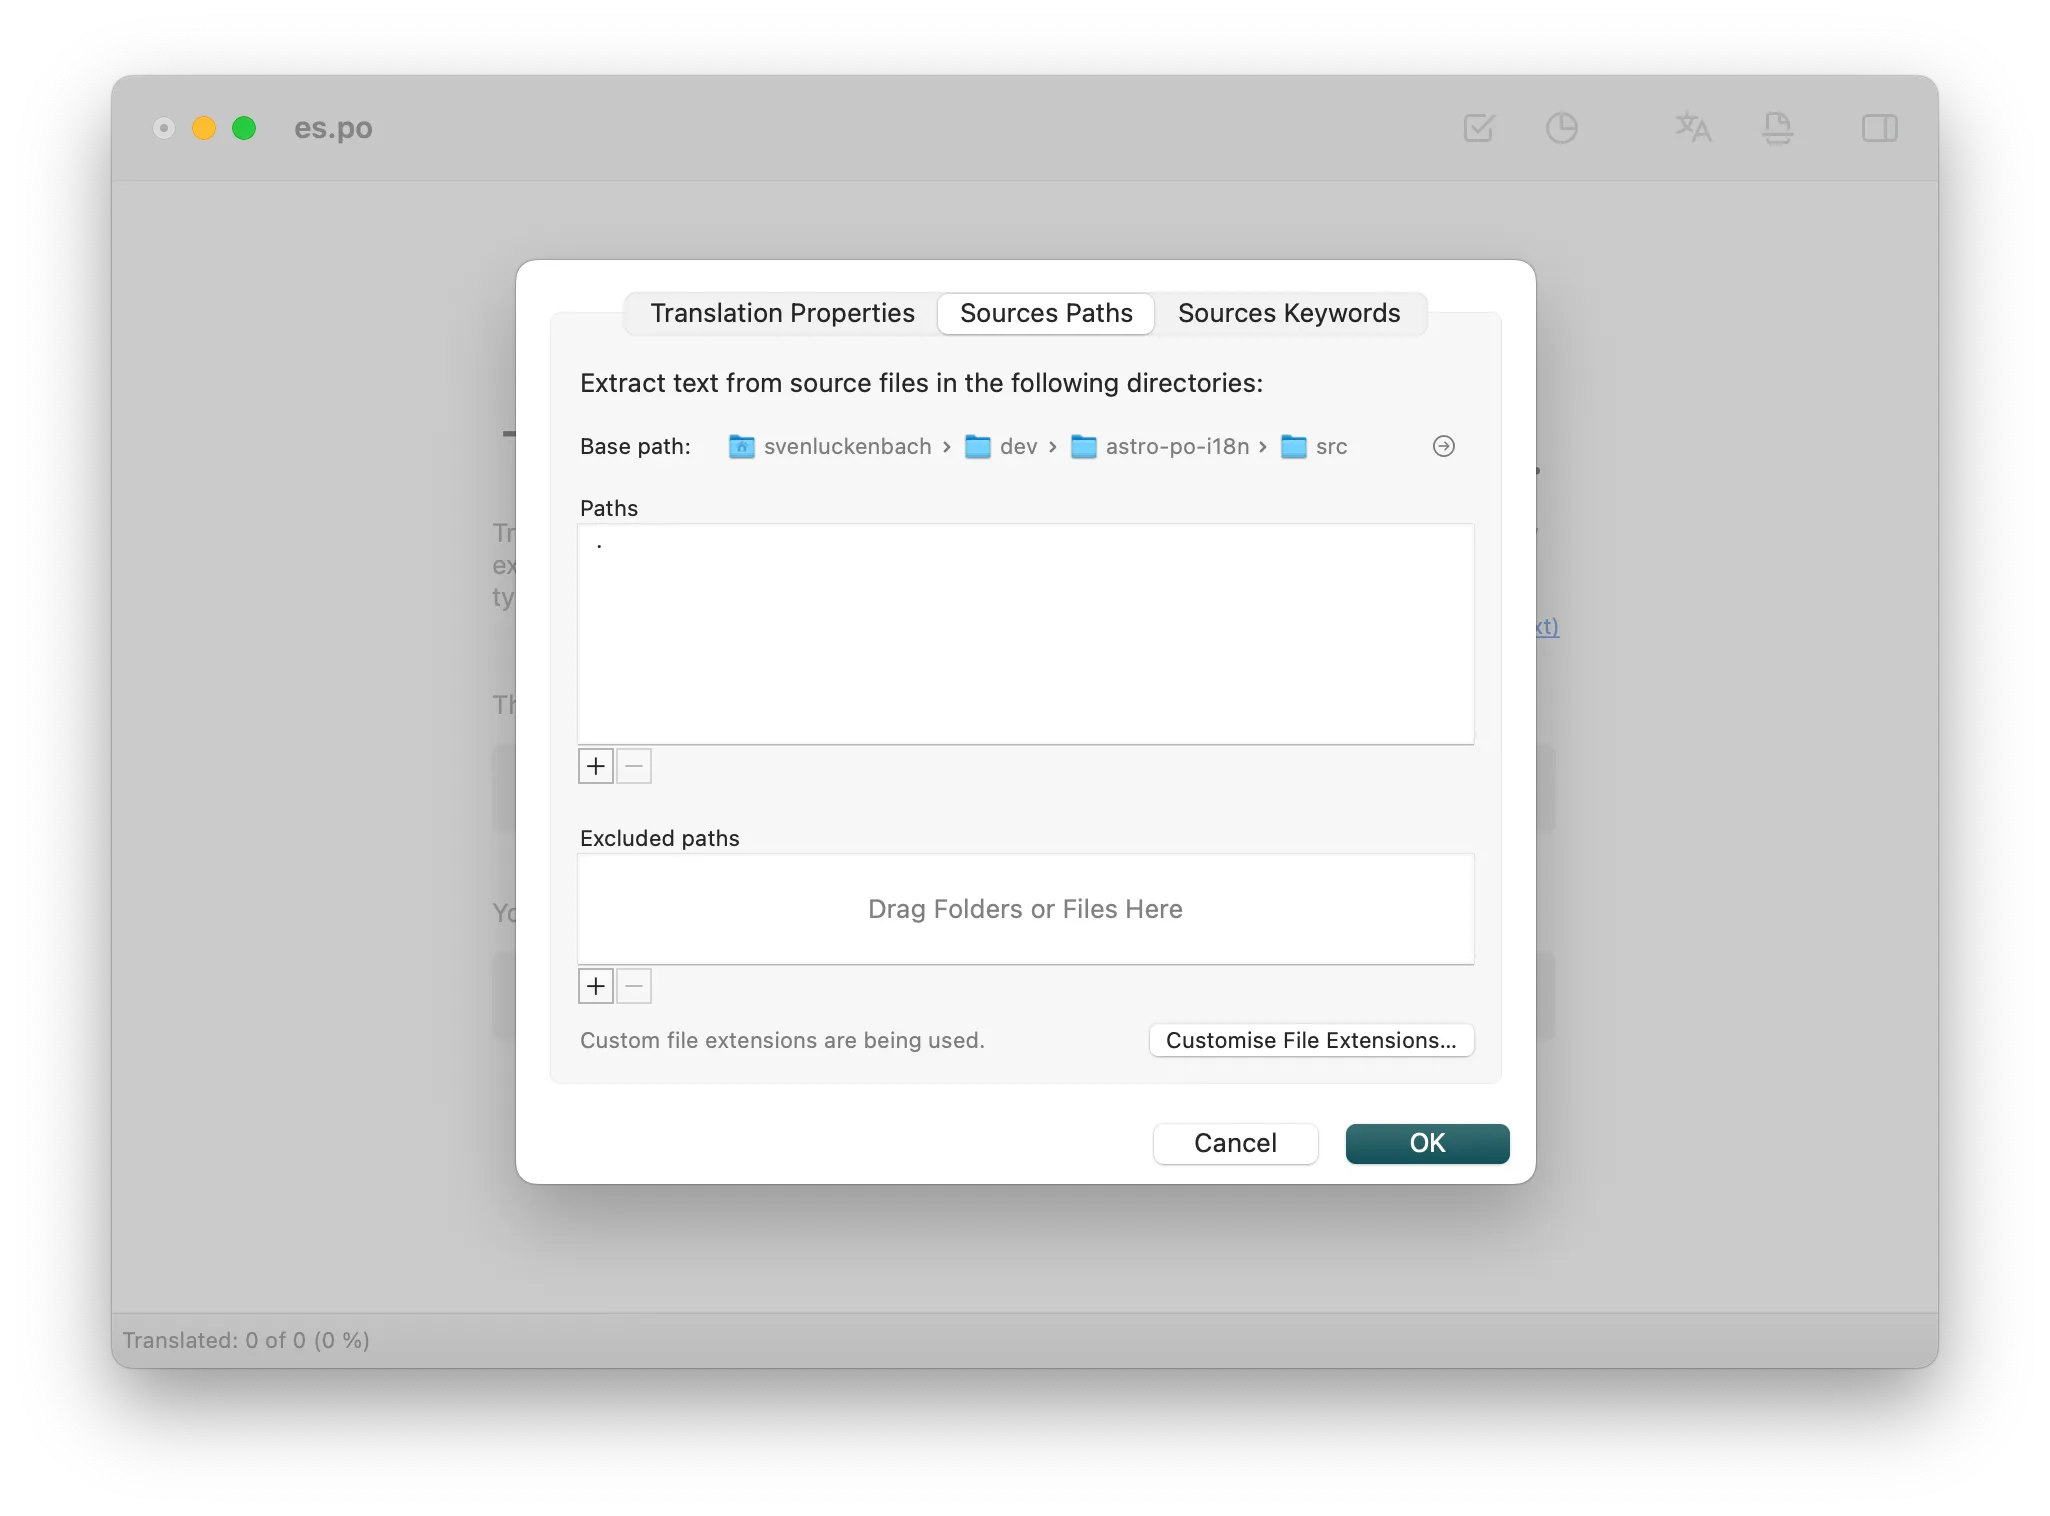
Next Poedit needs to know how to scan for things to translate. Click Extract from sources and within pathsadd the ./src folder.
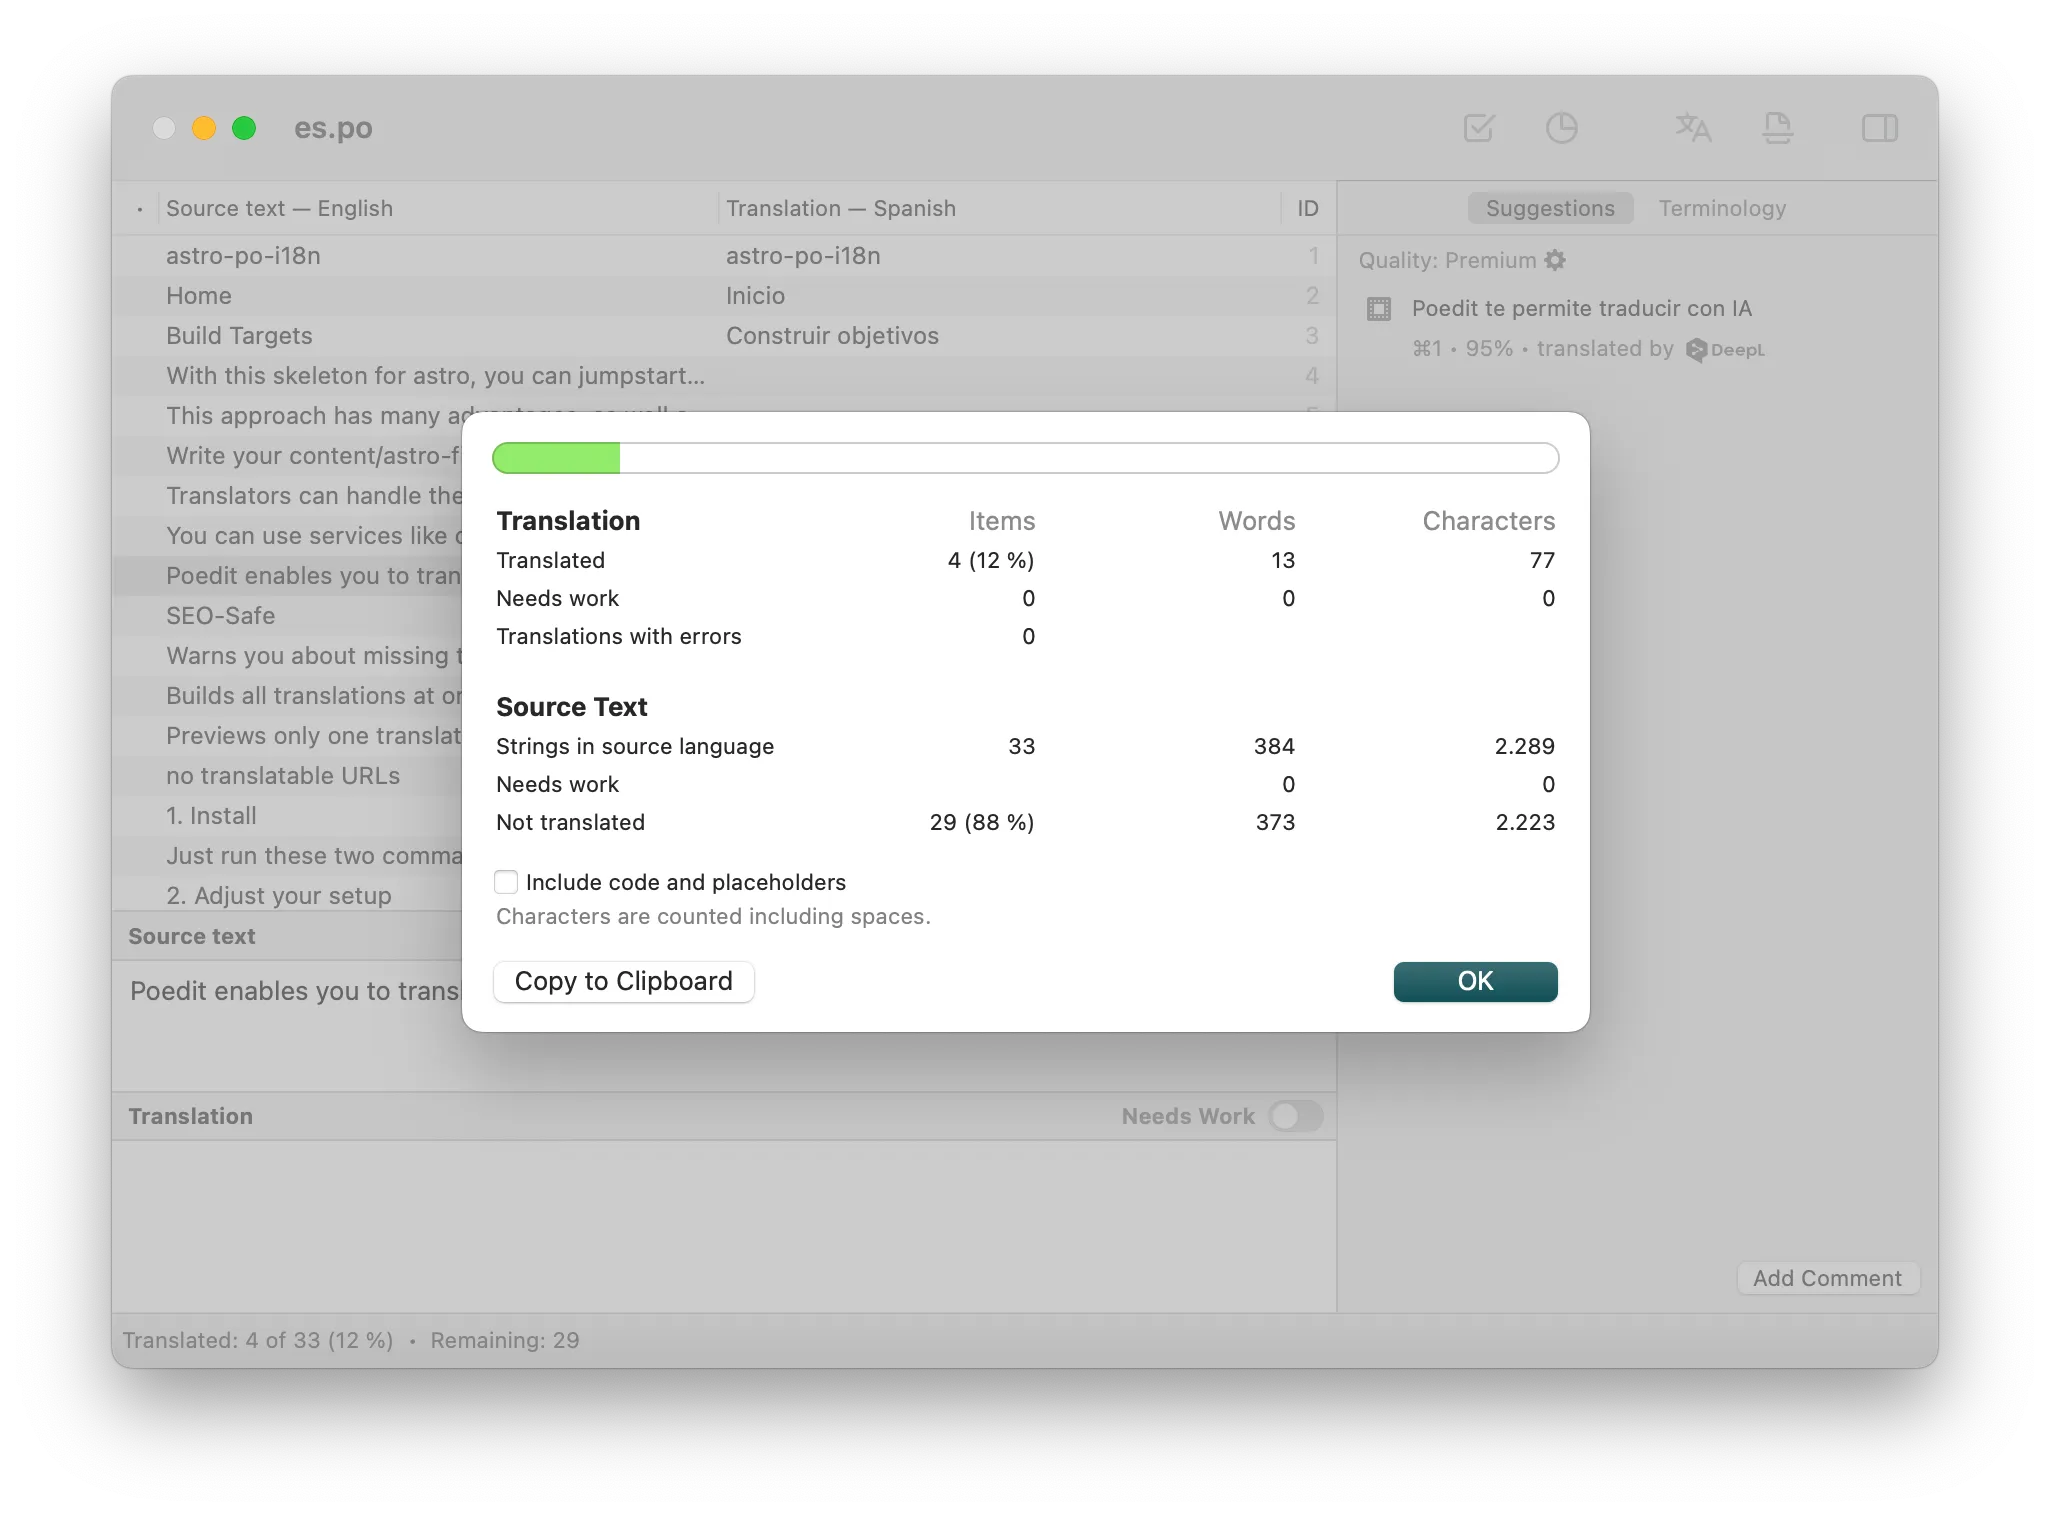
You can then translate by entering your translations to the bottom textarea. Notice how Poedit suggests translations on the right side from different sources.
Poedit also has useful stats that can be displayed.
At last, just relaunch npm run build:all to build all languages for your page, npm run dev to preview your main language, or npm run dev:es to preview your spanish translation.
Building all languages might look like this. Notice the warnings for missing translations.
The result can be seen here ;)